
How to Install an Outboard Motor: Step-by-Step Guide
How to Fit an Outboard Motor: Step-by-Step Guide
Fitting the outboard motor can seem a rather intimidating exercise, especially if one is doing it for the first time. But fitting is very easy using the correct tools and instructions. The following guide leads you through step by step how to fit an outboard motor and at the same time introduces you to different outboard motors available on sale, specifications, and much more. How to Install an Outboard Motor
While we’re at it, we’ll also refer you to where to buy new and rebuilt outboard motors from leading manufacturers like Yamaha, Honda, Suzuki, and Mercury. Not only would we like to help you have your motor installed correctly, but refer you to where to buy a quality, performance motor for your boat.
Why Proper Installation of an Outboard Motor Is Important
Prior to diving into the installation process, let’s highlight the reasons why correct installation matters:
- Performance: A properly installed engine delivers maximum propulsion and better fuel efficiency.
- Safety: Prevents accidents caused by misalignment or loose connections.
- Durability: Correct installation helps the motor to last longer without undue stress.
- Ease of Use: Simple steering and better control on the water.
Whether purchasing a 20 HP outboard motor for a tiny fishing boat or a 250 HP motor for a big boat, the installation is a performance-affecting process.
Tools and Materials Required
Have these tools grouped together before beginning:
- Wrenches and socket set
- Drill and drill bits (if necessary for mounting holes)
- Marine-grade bolts, washers, and nuts
- Screwdrivers (flathead and Phillips)
- Measuring tape and level
- Grease and marine sealant
- Steering and control cables (if not pre-mounted)
- Fuel line and primer bulb
- Battery and wiring harness
Step-by-Step Install Guide to an Outboard Motor
1. Prepare the Transom
The transom is the rear (stern) flat surface of your boat on which the motor is mounted. Make sure it is:
- Strong and not damaged to support engine weight.
- Level and accurately measured to mount the motor.
- Drilled with correct bolt holes (if not already provided).
Most new outboards share the same bolt pattern, so mounting on most boats is easy.
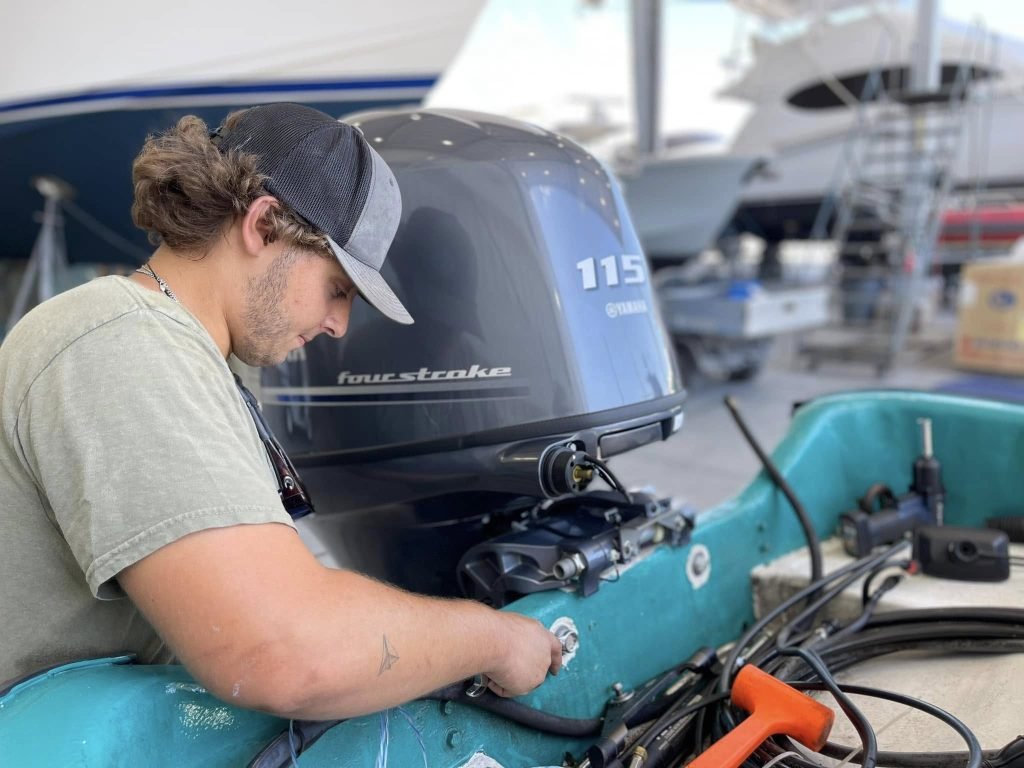
2. Install the Outboard Motor
With a second helper or a hoist (large motors):
- Carefully lift the motor.
- Line up transom holes with mounting holes on bracket.
- Balance motor over the boat by centering it.
💡 Pro Tip: A slanted engine produces steering problems and unbalanced performance.
3. Bolt the Motor Down
Install marine-grade bolts into holes. Use:
- Heavy washers to distribute pressure.
- Locknuts so they don’t loosen with vibration.
- Marine sealant on and around holes to prevent water entry.
Bolt up in steps, with the motor lying flat on the transom.
4. Fit the Steering System
Outboard motors employ different steering systems:
- Tiller Handle Steering – On smaller engines (2–20 HP). Mount and fit the handle only.
- Cable Steering – Mid-range engines standard (30–150 HP). Attach motor tiller arm to steering cable.
- Hydraulic Steering – On high-horsepower engines (150–300 HP). Run hydraulic hoses and bleed air from the system.
5. Install Throttle and Shift Controls
Your outboard motor comes with control cables that operate throttle and shifting.
- Run control box cables to the engine.
- Connect throttle and shift linkages as per manufacturer instructions.
- Check for smooth shifting (forward, neutral, reverse).
6. Install Fuel System
Outboard motors require a fuel tank and hose system:
- Join the fuel line from the tank to the engine.
- Prime fuel to the carburetor or fuel injection system using a primer bulb.
- Tighten for snug fit and inspect for leaks.
7. Electrical Connections
For electric-start outboard motors, join the battery:
- Positive (red) cable to the starter terminal.
- Negative (black) cable to the ground terminal.
- Secure against vibration damage.
Also, add ignition wire and kill switch lanyard for safety.
8. Test Run the Motor
Prior to heading out into the water:
- Attach water supply (flush muffs) to cool motor.
- Crank engine and take idle speed reading.
- Check response of throttle, shifting, and steering.
- Check for pumping of water through cooling system in a normal manner.
Provided everything goes according to plan, your outboard motor is now ready to function.
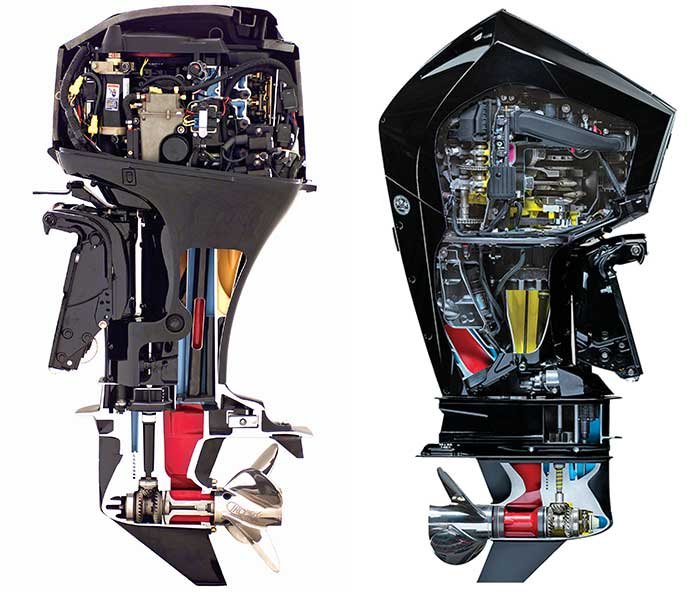
Selecting the Right Outboard Motor for Your Boat
Half the job is installing an engine—you have to have the right engine. Here are our main options that we provide:
1. Small Outboard Motors (2–20 HP)
- Lightweight and compact
- For dinghies, inflatables, and small fishing boats
- Tiller steering and manual start
Example Specs:
- Yamaha 9.9 HP 4-Stroke
- Weight: 87 lbs
- Fuel Tank: 3 gallons external
- Steering: Tiller
2. Mid-Range Outboard Motors (25–90 HP)
- For medium fishing boats and pontoons
- Remote steering and electric start
- Fuel-efficient 4-stroke models
Example Specs:
- Honda BF60 60 HP 4-Stroke
- Weight: 239 lbs
- Fuel Injection System
- Optional Power Tilt/Trim
3. High-Horsepower Outboard Motors (100–300 HP)
- For speedboats, offshore fishing, and larger boats
- Advanced digital controls and hydraulic steering
- Strong acceleration and peak speed
Example Specs:
- Suzuki DF250AP
- 250 HP 4-Stroke DOHC
- Weight: 639 lbs
- Drive-by-Wire System
- Suzuki Selective Rotation
4. Premium Options – Mercury & Yamaha
- Mercury 300 HP Verado – Supercharged power, advanced control systems.
- Yamaha F250 – Reliability, smooth shifting, fuel efficiency.
We deal with brand new and second-hand outboard motors, providing you with options based on the size of your boat and budget.
Why Buy Outboard Motors from Us?
- Range of Engines: 2 HP portable motors to 300 HP high-horsepower motors.
- Worldwide Shipping: International shipping using secure and reliable shipping processes.
- Affordable Pricing: New and second-hand motors.
- Professional Guidance: We guide you to choose the proper motor in addition to giving advice on installation.
Maintenance Tips after Installation
- Flush engine after every use (especially in saltwater).
- Check oil levels regularly (in 4-stroke engines).
- Inspect propeller damage.
- Keep fuel lines and filters clean of contaminants.
- Do on manufacturer’s schedule.
Final Thoughts
Installing an outboard motor is a doable project if done with careful instructions. This guide walks you through it step by step, giving you everything you need to install, hook up, and have your new motor running successfully.
If you are looking to buy a reliable outboard motor, new or used, we have extensive inventory from the most reputable brands like Yamaha, Honda, Suzuki, and Mercury. Shop our selection today and select the perfect companion for your boat.
Posts Widget
-
1

-
2

-
3

-
4


S.H Continental Marine
USA HERALD MAGAZINE INC
Our team is dedicated to providing exceptional customer service.
Email: info@shcontinentalmarine.com
Choose S.H Continental Marine
for your outboard engine needs and enjoy superior quality, exceptional customer service, and unbeatable prices.