
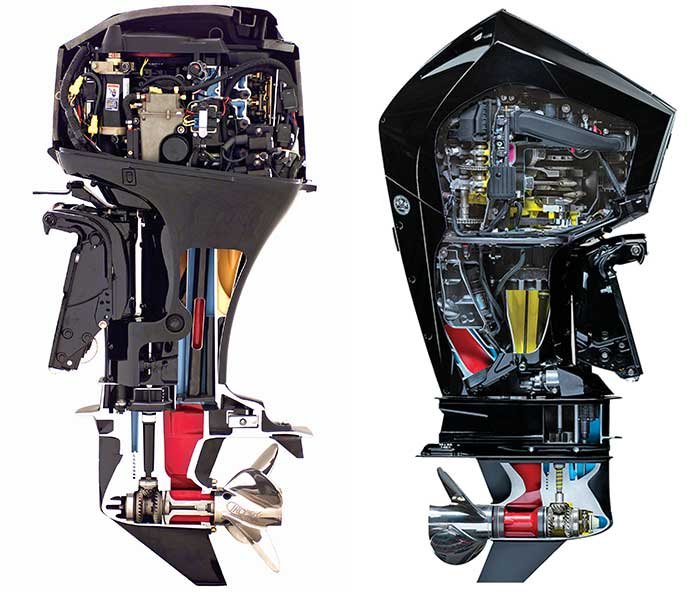
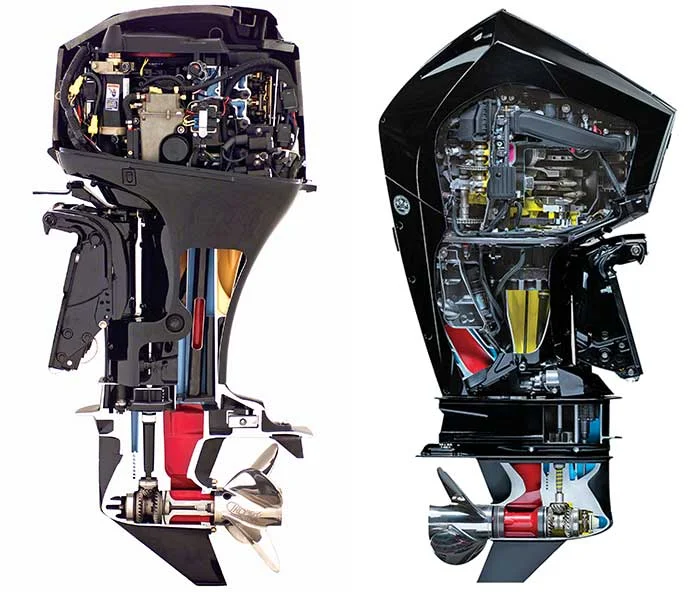
Outboard Engine Installation: The Complete Step-by-Step Guide

Outboard engine installation is where a good engine purchase either turns into a boat that runs right for the next decade, or one that never quite performs the way the spec sheet promised. Buying the right engine is genuinely half the job — the other half is getting it mounted, wired, and rigged correctly. This isn’t meant to replace a professional install — for anything beyond a small tiller motor, we’d genuinely recommend a certified marine mechanic — but knowing what’s actually involved helps you have a useful conversation with whoever does the work, and helps you spot a rushed job before it costs you.
This guide walks through every stage of a proper outboard engine installation, from shaft length and mounting through wiring, fuel systems, break-in, and what a professional job typically costs.
Tools and Preparation Before You Start
A proper outboard engine installation calls for more than a socket set. At minimum, expect to need a torque wrench rated for the bolt sizes involved, marine-grade sealant for through-hull penetrations, a wiring crimp tool for marine-rated connectors, and a way to safely lift and support the engine while it’s positioned on the transom — even a 40 HP engine is too heavy and awkward to hold in place by hand while bolting it down. Having a second person on hand for the initial mounting step alone is worth arranging ahead of time.
Getting the Shaft Length Right
This is the single most common mistake in outboard installation, and it happens before the engine even touches the transom. Shaft length has to match your boat’s transom height, measured from the top of the transom straight down to the bottom of the hull. Get it wrong and the propeller either sits too high, causing cavitation and a rooster tail of wasted power, or too low, creating excess drag. Most recreational boats run 15″, 20″, or 25″ shafts, while larger yachts with deep transoms need 30″ or 35″ options like those found on Yamaha’s V8 outboards.
Mounting the Engine
The engine bolts to the transom using through-bolts, not lag screws or anything that only bites into the outer skin of a fiberglass or aluminum transom. On a fiberglass boat, this usually means backing plates on the inside of the transom to spread the load, since a transom that flexes under load will eventually crack around the mounting bolts. Torque specs matter here — overtightening can crush the transom core, while undertightening leaves the engine vulnerable to vibration loosening the bolts over time.
Step-by-Step: A Typical Single-Engine Installation
Every install varies by boat and engine, but a straightforward single-engine job generally follows this sequence:
- Confirm shaft length against transom height before the engine arrives, not after.
- Inspect and prep the transom, including backing plates if needed.
- Mount the engine with through-bolts torqued to spec.
- Run and connect steering, whether tiller, mechanical cable, or digital electric.
- Wire the engine to the battery and control systems with properly sized, sealed marine wiring.
- Connect and prime the fuel system, checking for leaks before first start.
- Select and mount an appropriate propeller based on boat weight and typical use.
- First start and initial adjustment, checking water flow, idle, and steering response at the dock.
- Sea trial and break-in, varying RPM over the first several hours of running.
Steering and Control Rigging
Tiller-steered motors like the Yamaha F40JEHA skip most of this step, since the tiller handle is integrated into the engine itself. Remote steering setups need cables run from the helm to the engine, properly lubricated and free of sharp bends that will bind over time. Modern digital electric steering, like what you’ll find on larger V8 outboards, replaces mechanical cables with wiring harnesses, which is cleaner but requires correct connector seating and a technician familiar with the electronic control system.
Wiring and Electrical
Every outboard needs a clean run from the battery to the engine, sized correctly for the amperage — undersized wiring is a common cause of hard starting and dim electronics even when the battery itself is fine. Marine-grade tinned wire resists corrosion far better than standard automotive wire, and it’s worth the extra cost given how much salt exposure the wiring harness will see over the engine’s life. All connections should be sealed, not just taped, since moisture intrusion at a wire splice is one of the more common electrical failures on a boat.
Fuel System Connection
EFI engines are less forgiving of fuel system problems than old carbureted motors were. Fuel lines need to be rated for ethanol-blended gasoline, properly primed before first start, and free of air leaks that will cause hard starting or stalling under load. If you’re repowering an older boat, it’s worth replacing fuel lines and the primer bulb at the same time as the engine rather than assuming old fuel system components will be fine with a new motor.
Propeller Selection and Initial Setup
The engine doesn’t come pre-matched to your specific hull — propeller pitch and diameter need to be selected based on boat weight, typical load, and whether you’re prioritizing top speed or acceleration. Most installers start with a manufacturer-recommended prop and adjust from there after a test run, since it’s common to need a different pitch once you see how the boat actually performs loaded with passengers and gear.
Kill Switch and Safety Systems
Every outboard installation should include a properly connected engine kill switch lanyard, which cuts the engine if the operator is thrown from the helm. This is a basic safety item that’s sometimes skipped or improperly wired during a rushed DIY install, and it’s worth confirming it’s tested and working before the boat ever leaves the dock. Beyond the kill switch, check that any digital control system’s neutral safety interlock is functioning, since it prevents the engine from starting in gear.
First Run and Break-In
New four-stroke outboards need a break-in period, typically varying engine speed for the first several hours rather than running steady at one RPM, and avoiding sustained wide-open throttle. This lets rings seat properly and bearings wear in evenly. Skipping break-in doesn’t always cause immediate problems, but it can shorten engine life and is one of the easier things to get right since it just costs you a bit of patience early on.
What a Professional Installation Typically Costs
Installation cost varies widely by engine size, boat type, and region, but as a rough guide, a straightforward single-engine tiller install on a small boat often runs a few hundred dollars in labor, while a remote-steering or digital electric setup on a larger engine can run into the low thousands once cabling, a new control head, and rigging hardware are factored in. Multi-engine yacht installs are their own category entirely and are typically quoted individually based on the specific configuration. Getting a written quote that separates parts from labor makes it much easier to compare installers.
When to Hire a Professional
A small tiller-steered engine under 25 HP is within reach for a mechanically confident owner. Anything with remote steering, digital electric controls, or multi-engine rigging is worth handing to a certified installer — the cost of a professional install is small compared to the cost of a transom repair or a fuel system fire from a rushed DIY job.
Post-Installation Storage and Winterization
Once the engine is installed and broken in, proper storage habits protect the investment you just made. Flush the cooling system after every saltwater run, and before any extended layup, stabilize the fuel, change the oil, and fog the cylinders per the manufacturer’s instructions. Skipping this step on a freshly installed engine is a common way to undo a good installation job with an easily avoidable corrosion or fuel problem come spring.
Getting Your Engine and Installation Sorted
We sell outboard motors across the full HP range, from small tiller models through V8 yacht power, and can point you toward qualified installers if you don’t already have one. Contact our team with your boat’s transom height and current setup, and we’ll help make sure the engine you order is the right fit before installation day. Browse our full outboard motor catalog to see current stock and pricing. We ship worldwide.
The American Boat and Yacht Council publishes the technical standards most certified marine installers work from, and it’s a useful reference if you want to understand the safety standards behind a proper install.
Frequently Asked Questions
Can I install an outboard motor myself?
Small tiller engines are manageable for a confident DIYer. Anything with remote or digital steering, or multi-engine setups, is better left to a certified installer.
How long does a professional installation take?
A straightforward single-engine swap typically takes half a day to a full day. Multi-engine or digital steering rigs take longer.
Do I need to replace fuel lines when installing a new engine?
If they’re original to an older boat, yes — it’s cheap insurance against fuel system problems that would otherwise get blamed on the new engine.
What tools do I need for a basic outboard installation?
At minimum a torque wrench, marine sealant, marine-rated wiring and crimp tools, and a safe way to support the engine while mounting it.
How much does professional outboard installation typically cost?
It varies widely, but a simple tiller install often runs a few hundred dollars in labor, while digital steering setups on larger engines can run into the low thousands.
Is a kill switch lanyard really necessary?
Yes — it’s a basic safety requirement that cuts the engine if the operator is thrown from the helm, and it should be tested before the boat leaves the dock.
What happens if I skip the break-in period?
It doesn’t always cause immediate problems, but skipping break-in can shorten engine life by not allowing rings and bearings to seat properly.
Posts Widget
- 1

- 2

- 3
- 4


S.H Continental Marine
USA HERALD MAGAZINE INC
Our team is dedicated to providing exceptional customer service.
Email: info@shcontinentalmarine.com
Choose S.H Continental Marine
for your outboard engine needs and enjoy superior quality, exceptional customer service, and unbeatable prices.
